 1-361-589-1048
Last Updated: October 25, 2026
Quick Summary
To apply stickers curved surfaces, start by cleaning the surface thoroughly with soap, water, and rubbing alcohol, then choose your application method based on curve type and sticker size. Use dry application with center-out squeegee pressure for simple curves, or heat plus relief cuts for compound curves that bend in multiple directions.
- Clean curved surfaces with soap, water, and rubbing alcohol to remove oils and dust that prevent adhesion.
- Use high-opacity vinyl with permanent or heavy-duty adhesive for better conformity and durability on curved surfaces.
- Apply small stickers on simple curves dry from center outward, but use heat and relief cuts for compound curves.
- Warm vinyl to 90-110°F with a heat gun held 6-8 inches away to make it flexible without damaging the surface.
- Let stickers cure for at least 24 hours before exposing them to water or rough handling.
Table of Contents
- Preparing and Cleaning Your Curved Surface
- Choosing the Right Vinyl Sticker and Adhesive
- How to Apply Vinyl Decals to Curved Surfaces
- Vinyl Sticker Application Tools You'll Need
- How to Prevent Bubbles in Vinyl Stickers
- How to Make Stickers Stick to a Water Bottle
- Common Mistakes to Avoid When Applying Stickers to Curved Surfaces
- Troubleshooting and Aftercare for Your Vinyl Stickers
- Frequently Asked Questions
Preparing and Cleaning Your Curved Surface
Surface preparation is the foundation when you apply stickers curved surfaces; a dirty or oily surface is the fastest way to watch vinyl peel off within weeks.
Next, wipe with rubbing alcohol on a clean cloth to remove oils and residue soap misses.
On curved surfaces like water bottles or helmets, pay extra attention to textured areas where dust hides in the grooves.
Choosing the Right Vinyl Sticker and Adhesive
Material and adhesive type determine how well a vinyl sticker conforms and stays put on curved surfaces.
Adhesive strength matters too. Standard adhesive suits flat surfaces, but curved surfaces need a stronger bond, look for permanent or heavy-duty labels.
Consider the surface too: plastic water bottles need different adhesive than painted helmets, and smooth surfaces hold stickers better than textured ones.
Temperature affects adhesive performance: cold vinyl is stiff and cracks when stretched, while warm vinyl (around 70-80°F) is flexible.
How to Apply Vinyl Decals to Curved Surfaces
The key is distinguishing simple curves from compound curves, then choosing a method that matches the geometry, sticker size, and material.
Simple curves bend in one direction, like a water bottle or bike frame tube. Compound curves bend in two directions at once, like a rounded corner or helmet crown. A flat sticker conforms to a simple curve by stretching along one axis; on a compound curve the vinyl must stretch two ways at once, which is where wrinkles, lifts, and trapped air appear.
Choose your method before you peel
Use this decision guide to pick a technique instead of defaulting to one approach:
- Small sticker (under about 4 inches) on a simple curve: dry application with center-out squeegee pressure is fastest and cleanest.
- Large sticker (over about 6 inches) on a simple curve: dry application still works, but work in 2-3 inch sections and keep the backing on the unworked portion.
- Any sticker on a compound curve: plan for heat plus relief cuts. Dry application alone will usually wrinkle.
- Thin or cast vinyl on a compound curve: heat is often enough without cuts if the curve is gentle; add cuts only where the vinyl bridges.
- Thick or calendared vinyl on a tight compound curve: expect to use relief cuts and accept small overlaps at the cuts.
- Decal with a transfer tape top layer: apply dry, squeegee the tape side first, then remove the tape at a low angle rather than pulling straight up.
- Wet application: useful for large flat or gently curved decals where you need repositioning time, but avoid it on porous or textured surfaces and on stickers with paper-based liners.
Dry application on a simple curve
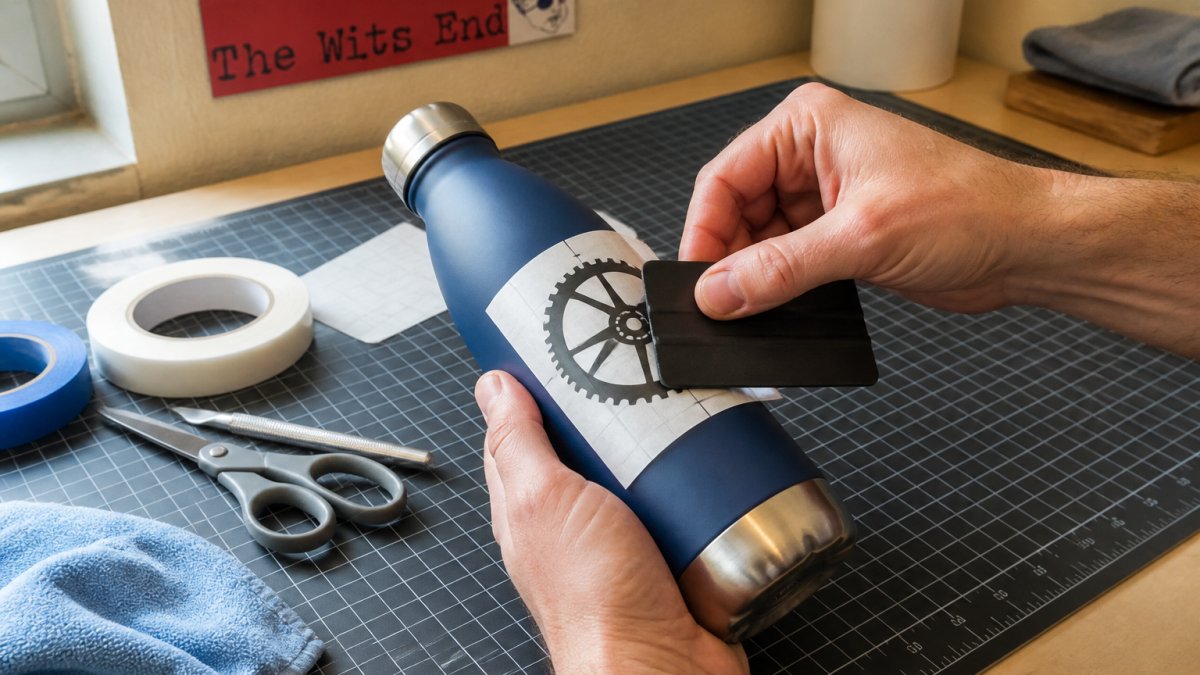
Position the sticker at the center of the curve. Peel back only a few inches of backing, press that section down, then smooth from the center outward with a squeegee or a credit card wrapped in a lint-free cloth.
Heat-assisted application on compound curves
Warm the vinyl before it touches the surface. Use a heat gun on low held 6-8 inches away, sweeping until the vinyl feels pliable but not hot; aim for a vinyl surface temperature around 90-110°F, which most heat guns on low reach in under 10 seconds at that distance.
Apply the warmed vinyl from the center outward, pressing it into the curve with your thumb or a squeegee. Let it cool a few seconds before the next area; warming and pressing in stages lets the adhesive flow into the curve.
Relief cuts for tight compound curves
When vinyl bridges across a hollow instead of lying down, a relief cut lets it overlap itself. Make cuts from the edge toward the center, stopping just short of the printed design, spaced about 1-2 inches apart around tight curves.
Work slowly. Apply pressure gradually and let the vinyl relax between sections. Rushing causes wrinkles that become permanent once the adhesive grabs.
Choose your application method based on sticker size, curve type, and vinyl material.
| Sticker Size & Curve Type | Best Method | Key Consideration |
|---|---|---|
| Small sticker on simple curve | Dry application with squeegee | Work center outward |
| Large sticker on simple curve | Dry application in sections | Keep backing on unworked portion |
| Any sticker on compound curve | Heat plus relief cuts | Plan for wrinkles without heat |
| Thin or cast vinyl on compound curve | Heat only if gentle curve | Add cuts where vinyl bridges |
| Thick or calendared vinyl on tight curve | Relief cuts with overlaps | Accept small overlaps at cuts |
| Decal with transfer tape | Dry application, remove tape low | Avoid pulling tape straight up |
| Large flat or gently curved decal | Wet application | Avoid porous or textured surfaces |
Vinyl Sticker Application Tools You'll Need
You don't need expensive equipment, but the right tools make the difference between a sticker that conforms and one that wrinkles.
Rubbing alcohol (isopropyl, 70% or higher) (the CDC). Use it to clean the surface before application; it evaporates quickly and leaves no film.
Heat gun or hairdryer. A heat gun on low is the right tool for compound curves; a hairdryer on high works for gentle curves but is slower. The safety limits matter more than the tool:
- Hold the gun 6-8 inches from the surface and keep it moving.
- Aim for a vinyl surface temperature around 90-110°F, not the 300°F some guides cite. Vinyl softens well below the temperature that damages it, and 300°F is hot enough to distort film, melt adhesive, and damage plastic or painted surfaces underneath.
- Never point a heat gun at a helmet shell, plastic bottle, or painted finish for more than a few seconds at a time. Many plastics soften well below 200°F, and clear-coat paints can blister.
- Keep a hand near the surface to feel for heat buildup, and stop if the vinyl gloss turns dull or the edges start to curl.
- Do not use a heat gun near solvent fumes, and let the tool cool before storing it.
Lint-free microfiber cloths. Paper towels leave fibers trapped under vinyl that create lift points; microfiber is right for cleaning and for wrapping a squeegee edge on delicate graphics.
Cutting tools. A sharp craft knife or X-Acto blade is for relief cuts on compound curves.
Painter's tape. Use it to mark a centerline or a placement box before you peel any backing.
How to Prevent Bubbles in Vinyl Stickers
Air bubbles trap moisture and create weak points where vinyl peels, but most are preventable.
Center-out application is your primary defense: working from the middle outward pushes trapped air toward the edges where it escapes.
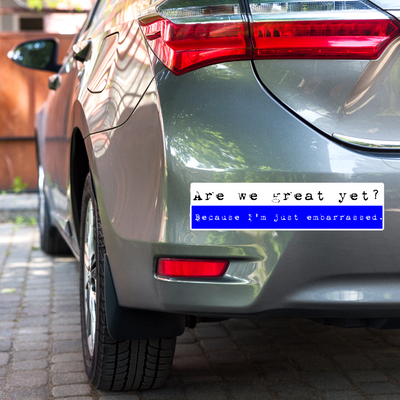
Hail Seitan Bubble-Free Sticker – Funny Vegan & Vegetarian Vinyl Decal →
Use a squeegee with firm, consistent pressure: light pressure leaves bubbles, heavy pressure tears vinyl.
For larger bubbles, use heat: a heat gun on low softens the vinyl enough to let the bubble escape.
The Wits End's bubble-free stickers are engineered for smooth application.

How to Make Stickers Stick to a Water Bottle
Water bottles are curved, often plastic, and constantly exposed to moisture, so stickers must handle all three.
Start with thorough cleaning.
Peel back just a small section of backing and position it, then smooth from the center outward with your squeegee in small sections.
Place stickers on the bottom or sides rather than near the opening, where moisture and handling are worse. Browse weather-resistant stickers designed for water bottles to see options built for this curved surface use case.
Avoid washing the bottle in hot water for the first week; warm water can soften the adhesive before it sets.
Common Mistakes to Avoid When Applying Stickers to Curved Surfaces
Most people make the same errors when they apply stickers curved surfaces.
Skipping surface preparation is the most common mistake.
Applying too much sticker at once causes wrinkles and bubbles.
Using too much pressure can tear delicate vinyl.
Forgetting to let it cure means your sticker isn't fully bonded when exposed to water or rough handling.
Not making relief cuts on compound curves causes permanent wrinkles.
Troubleshooting and Aftercare for Your Vinyl Stickers
Even with perfect technique, things can go wrong.
Wrinkles or creases caught early can sometimes be smoothed out.
Peeling edges usually mean the surface wasn't clean enough or the adhesive wasn't strong enough.
Faded colors happen over time, especially outdoors, as UV light breaks down vinyl over months or years.
Removal requires patience. Peel slowly at a low angle to avoid tearing the surface underneath.
For long-term care, avoid extreme temperatures and harsh chemicals, and don't scrub with abrasives.
Frequently Asked Questions
How do you apply a sticker to a curved surface without wrinkles?
Start by cleaning the curved surface thoroughly with rubbing alcohol and let it dry completely. Position the sticker at the center of the curve and work outward using a squeegee or card, applying gentle pressure. Use a heat gun on low to warm the vinyl slightly, which makes it more pliable and easier to conform to the curve without creasing. For tight curves, make small relief cuts (slits) in the vinyl backing to allow it to stretch smoothly around the shape.
Can you use heat when applying a sticker to a curved surface?
Yes, heat is helpful for curved surfaces. A heat gun set to low or medium temperature softens the adhesive vinyl, making it more flexible and easier to manipulate around curves. Warm the vinyl for just a few seconds at a time, keeping the gun 6-8 inches away to avoid damaging the sticker or the surface. Heat also improves adhesion by allowing the vinyl to stretch and conform better to compound curves.
How do you keep stickers from peeling off a water bottle?
Clean the bottle thoroughly with rubbing alcohol before applying the sticker, as oils and residue prevent proper adhesion. Apply the sticker using firm, even pressure with a squeegee or smooth card, working from the center outward. For water bottles, choose high-opacity vinyl with durable adhesive. Avoid applying stickers to heavily textured or curved areas where water pools, and let the adhesive cure for 24 hours before exposing the bottle to water or heat.
Do you need to cut a sticker to apply it around a curve?
For simple curves, you can often apply the sticker without cutting by using heat and gentle stretching. For compound curves or tight bends, relief cuts (thin slits radiating from the curve) help the vinyl conform without bunching. Make cuts only as deep as needed, stopping before you reach the visible design. Relief cuts are especially useful on rounded helmets, cylindrical bottles, and irregular shapes where the vinyl would otherwise fold or wrinkle.
Applying stickers to curved surfaces takes practice, but the technique is straightforward once you understand the fundamentals. Clean thoroughly, choose the right materials, work from the center outward, and avoid common mistakes. The result is a professional-looking sticker that stays put. Start with one of The Wits End's bubble-free sticker options and follow these steps. You'll see exactly how good technique produces a smooth, lasting finish that makes your gear look sharp.